How to plan built-in IKEA cabinets that look custom

Built-in IKEA cabinets can give a room a clean, fitted look, but the result depends on decisions made before the first box is assembled. Choose the IKEA system that fits the room, allow space for fillers and scribes, anchor units correctly, and avoid treating freestanding furniture as structural cabinetry. SEKTION is usually the strongest starting point for kitchens, mudrooms and media walls; PAX is suited to wardrobe-style storage; BILLY can work for bookcase walls when it is properly secured and trimmed. The custom look comes from a level base, consistent reveal lines, finished side panels, crown or ceiling closure, and paintable finish details—not from hiding every gap. For more design context, browse the built-in furniture archive.
What built-in IKEA cabinets can and cannot do
A built-in project using IKEA parts is best understood as a hybrid installation. The storage boxes, doors, drawers and interior fittings come from a modular system. The site-built work—platforms, fillers, face frames, side panels, toe kicks, crown, soffits and wall scribes—makes those modules fit the room. This can be efficient because the cabinet interiors and hardware are already engineered, but it is not the same as commissioning custom cabinetry for an irregular wall or a highly specific millwork detail.
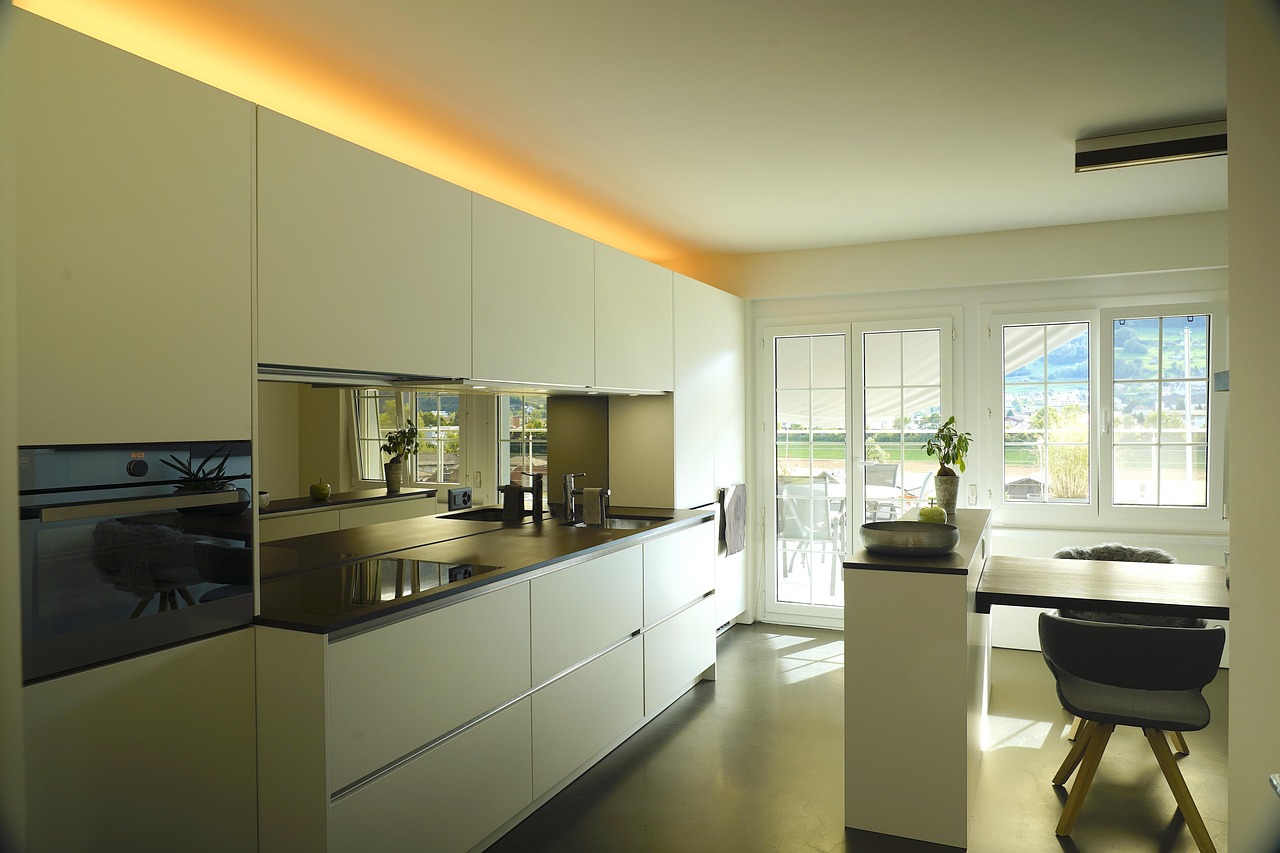
The search intent behind built in IKEA cabinets is usually practical. Homeowners want a fitted storage wall, a kitchen-like mudroom, a home office, a pantry, a closet or a bookcase wall without paying for fully custom casework. The main tradeoff is dimensional discipline. IKEA systems are modular, so either the room must adapt to the modules through fillers and trim, or the layout must be redesigned around available widths, depths and heights.
There are also clear limits. IKEA cabinets should not be used as load-bearing construction. Tall, freestanding or clothing-storage units must be anchored according to the instructions. Wet areas, appliance zones, fireplaces, HVAC returns, electrical outlets and uneven floors add complexity. If the project touches plumbing, wiring, ventilation, gas, structural walls or required clearances, the cabinet plan should be checked against local code and, where necessary, reviewed by a qualified trade professional.
Choose the right IKEA system for the room
The most important decision is the system. IKEA’s current U.S. information describes SEKTION as its main kitchen cabinet system with a 25-year limited warranty for covered residential kitchen components, while PAX is presented as a configurable wardrobe system with published frame heights, widths and depths. IKEA’s BILLY bookcase guide and product information also emphasize wall attachment for safety. (ikea.com)
| IKEA system | Best built-in use | Planning value | Main limitation |
|---|---|---|---|
| SEKTION | Kitchens, pantries, laundry rooms, mudrooms, media bases and storage walls | Cabinet boxes, drawers, fronts, rails and interiors are designed as a cabinet system; IKEA’s U.S. kitchen installation guide also uses suspension rail installation for wall cabinets. | Kitchen-style depths and modular widths may require fillers, panels and careful appliance clearance planning. |
| PAX | Closets, wardrobes, dressing rooms and bedroom storage walls | Frames are available in multiple heights, widths and depths, and the planner is built around wardrobe interiors. | It is not a kitchen cabinet system; door swing, ceiling clearance and anchoring must be planned early. |
| BILLY | Book walls, display shelving, home offices and low-budget library-style projects | The system is familiar, modular and available in multiple bookcase sizes and extension options. | It is shallow compared with many cabinet systems and must be secured to the wall as instructed. |
For a kitchen or mudroom, SEKTION is usually the most adaptable choice because base, wall and high cabinets can be combined into a cabinet layout. IKEA’s U.S. SEKTION category page lists common base cabinet sizes such as 12, 15, 18, 24, 30 and 36 inches wide, with common 24-inch-deep base options and shallower options in some configurations. (ikea.com)
For closets, PAX needs to be planned on its own terms. IKEA’s U.S. PAX planning guidance lists frame heights of 79 1/4 and 93 1/8 inches, widths of 19 5/8, 29 1/2 and 39 1/4 inches, and depths of 13 3/4 or 22 7/8 inches. It also notes extra height clearance for hinged or sliding doors and assembly clearance when standing a unit upright. (ikea.com)
Measure before designing the built-in frame
A built-in cabinet plan should begin with the actual room, not the product page. Measure the width at the floor, mid-wall and ceiling; measure ceiling height in at least three places; check whether the floor slopes; and note baseboards, window trim, door casing, outlets, vents, switches and thermostats. Many built-in projects run into trouble because the visible trim is designed before the room’s irregularities are understood.
Use the smallest verified opening as the controlling dimension. If a wall is 121 inches wide at the floor but 120 1/4 inches wide near the ceiling, the cabinet run must respect the tighter dimension. The difference can be handled with scribe strips, side fillers or a slightly reduced trim reveal, but it should not be discovered after assembly.
Ceiling height is especially important for tall wardrobes and bookcase walls. A unit may fit by product height but still need clearance to tilt upright, install doors, attach a wall anchor or hook onto a rail. IKEA’s PAX guidance, for example, distinguishes product height from practical clearance for doors and upright assembly. (ikea.com)
- Width: Plan a left and right filler instead of forcing cabinets tight to drywall.
- Height: Decide whether the top closes with crown, a flat valance, a soffit or an open reveal.
- Depth: Confirm door swings, drawer extension, appliance projection and walkway clearance.
- Floor level: Build a level platform when the floor varies, especially for long storage walls.
- Wall condition: Locate studs or suitable backing before cabinets are assembled.
Built-in details that create the custom look
The visual difference between an assembled cabinet run and a built-in is usually in the transitions. A true built-in appears to meet the floor, walls and ceiling intentionally. That effect requires a level base, consistent vertical lines, finished sides, and trim that accounts for the room’s imperfections.
Use a level platform or rail strategy
For base cabinets, a platform can help create a continuous built-in footprint, especially in a media wall, mudroom bench or office storage run. The platform should be level, securely fastened and designed for the finished toe-kick height. In kitchens, follow the cabinet system’s installation method. IKEA’s 2026 U.S. kitchen installation guide says IKEA cabinets can be hung on a suspension rail and notes clearance above the wall cabinet suspension rail for installation. (ikea.com)
Plan fillers as design elements
Fillers are not a sign of failure. They are what allow modular cabinet boxes to look intentional in a non-modular room. Narrow fillers at both ends of a run can make door reveals more balanced. Wider fillers may be needed beside walls so doors and drawers clear casing, knobs, pulls or uneven drywall.
Close the top deliberately
A tall cabinet wall can end in several ways: a small shadow reveal below the ceiling, a flat filler panel to the ceiling, crown molding, or a boxed soffit. The right choice depends on ceiling height, style and service access. In many modern rooms, a flat top rail or simple ceiling filler looks more current than ornate crown. In older houses, a scribed crown may better match existing trim.
Finish exposed sides
End panels are highly visible in built-ins. If the side of a cabinet run faces a doorway, seating area or hallway, use a finished side panel or a site-built return rather than leaving a raw transition. For painted projects, many installers use paint-grade side panels, caulked seams and color-matched trim, but the panel material should be selected for durability and the expected wear of the room.
Safety, clearances and code-related issues
Safety is not optional in a built-in project. IKEA’s BILLY buying guide states that the furniture must be attached to the wall with the enclosed wall fastener and that fixing devices should suit the wall material. IKEA’s safer-home guidance also emphasizes wall anchoring to reduce tip-over risk. (ikea.com)
In the United States, the Consumer Product Safety Commission states that the STURDY rule applies to covered clothing storage units manufactured after September 1, 2023, and defines covered units by criteria including free-standing status, minimum height, minimum mass and enclosed storage volume. This does not turn every built-in into a regulated clothing storage unit, but it reinforces why tall storage furniture should be treated seriously and anchored as instructed. (cpsc.gov) See also: buying guides.
Kitchen and workroom clearances deserve the same level of attention. The National Kitchen and Bath Association’s published planning guidance recommends a work aisle of at least 42 inches for one cook and 48 inches for multiple cooks, measured between counter frontage, tall cabinets or appliances. These are planning recommendations, not a substitute for local code, but they are useful when a built-in cabinet wall changes circulation. (media.nkba.org)
- Do not cover HVAC returns or supply vents without a designed alternative.
- Do not trap electrical junctions where they are no longer accessible.
- Keep appliance ventilation and manufacturer clearances intact.
- Anchor tall units into studs, blocking or appropriate masonry fasteners.
- Confirm that drawers, doors and appliance panels can open fully after trim is installed.
Cost and schedule factors to compare with custom cabinetry
The financial appeal of built-in IKEA cabinets is that the cabinet boxes, fronts and interior components are standardized. However, the installed cost is not limited to the store receipt. A realistic budget also includes delivery, assembly, hardware, panels, trim, platform lumber, fasteners, paint or finish work, countertop material if needed, lighting, electrical changes and labor.
Compared with custom cabinetry, the IKEA-based approach can be cost-effective when the room accepts standard modules and the finish details are straightforward. It becomes less efficient when the room requires many custom-depth pieces, unusual angles, integrated hidden doors, premium shop finishing or extensive wall repair. In those cases, the labor needed to make modular boxes appear custom can narrow the price gap.
Schedule is another factor. Stock availability, delivery timing, assembly time and return trips for missing parts can affect the project. A custom shop may take longer before installation but arrive with pre-built components designed for the exact opening. An IKEA-based project may start sooner, but the on-site fitting and trim phase can be more hands-on.
Common mistakes to avoid
The most common mistake is designing only from the front elevation. A wall of cabinets may look balanced on paper but fail in depth, door swing or ceiling clearance. Test the plan in three dimensions and include the trim, not just the cabinet boxes.
- Ignoring filler space: Leave room for scribing, door operation and uneven walls.
- Assuming walls are square: Measure in multiple places and check corners before ordering.
- Using the wrong system: SEKTION, PAX and BILLY solve different storage problems.
- Skipping anchoring: Tall storage and bookcase units should be secured according to instructions.
- Forgetting service access: Outlets, valves, junctions and vents may need relocation or access panels.
- Over-trimming: Too many decorative layers can make modular cabinets look bulky rather than built-in.
- Underestimating finishing labor: Caulking, sanding, painting and touch-up often determine the final impression.
A practical planning checklist
Before buying cabinets, confirm the project with a simple checklist. First, define the storage purpose: pantry, wardrobe, library, office, mudroom, media wall or kitchen. Second, choose the IKEA system that matches that purpose. Third, map the exact opening and mark obstacles. Fourth, build a cabinet layout that includes fillers, panels and top closure. Fifth, confirm anchoring and clearances. Sixth, estimate the full installed cost, not only the cabinet cost.
If the project includes a long wall, create a scaled elevation and a top-down plan. The elevation shows visual balance; the plan view reveals depth conflicts. For a cleaner result, align vertical door gaps where possible, group drawers by function, and avoid tiny leftover filler strips unless they are visually balanced on both sides.
The best built-in IKEA cabinets are not the ones with the most trim. They are the ones where the modular system, room measurements and finish details are coordinated from the beginning. When that coordination is missing, even expensive doors can look temporary. When it is present, standard cabinet parts can read as calm, fitted and architectural.
Frequently asked questions
Can IKEA cabinets really look built-in?
Yes, they can, especially when the design includes a level base, balanced fillers, finished side panels, wall scribes and a deliberate top treatment. The result depends more on measurement and finishing than on the cabinet boxes alone.
Which IKEA system is best for built-in cabinets?
SEKTION is generally the most cabinet-like choice for kitchens, pantries, mudrooms and media bases. PAX is better for wardrobes and closet storage. BILLY can work well for bookcase walls and display storage, but it should be anchored and planned around its shallower depth.
Do built-in IKEA cabinets need to be attached to the wall?
Tall cabinets, wardrobes and bookcases should be anchored according to the manufacturer’s instructions, and suitable wall fasteners should be used for the wall material. Built-in trim does not replace structural anchoring.
Should IKEA built-ins go all the way to the ceiling?
They can, but they do not have to. A ceiling-height design looks intentional when the top closure is planned with a filler, soffit, crown or reveal. If the ceiling is uneven, a scribed top piece may look better than forcing a perfectly straight cabinet line against an imperfect ceiling.
When is custom cabinetry a better choice?
Custom cabinetry may be better for unusual angles, nonstandard depths, high-end integrated finishes, historic trim matching, complex appliance panels or rooms where every inch must be optimized. IKEA-based built-ins are strongest when standard modules solve most of the storage problem and trim can handle the remaining fit.